Release 3.1.5
We are pleased to present Enterprise Lens 3.1.5. March 2024
This version of Enterprise Lens is aimed at improving usability, accelerating learning times and improves speed to value. This is achieved through the addition of wizards, refinements and use of templates, support for "numbers" and story telling enhancements.
| TABLE OF CONTENTS |
|---|
| 1. Association Wizard |
| 2. Power Lens Wizard |
| 3. Templates |
| 4. Support for Numbers |
| 5. Jira Codes |
1. Association Wizard
The Associations Wizard allows you to easily create new associations from any attribute within your Illustration.
This feature easily creates associations between your boxes in a few clicks, based on the attributes within boxes. It does this by creating child boxes with the names of attributes.
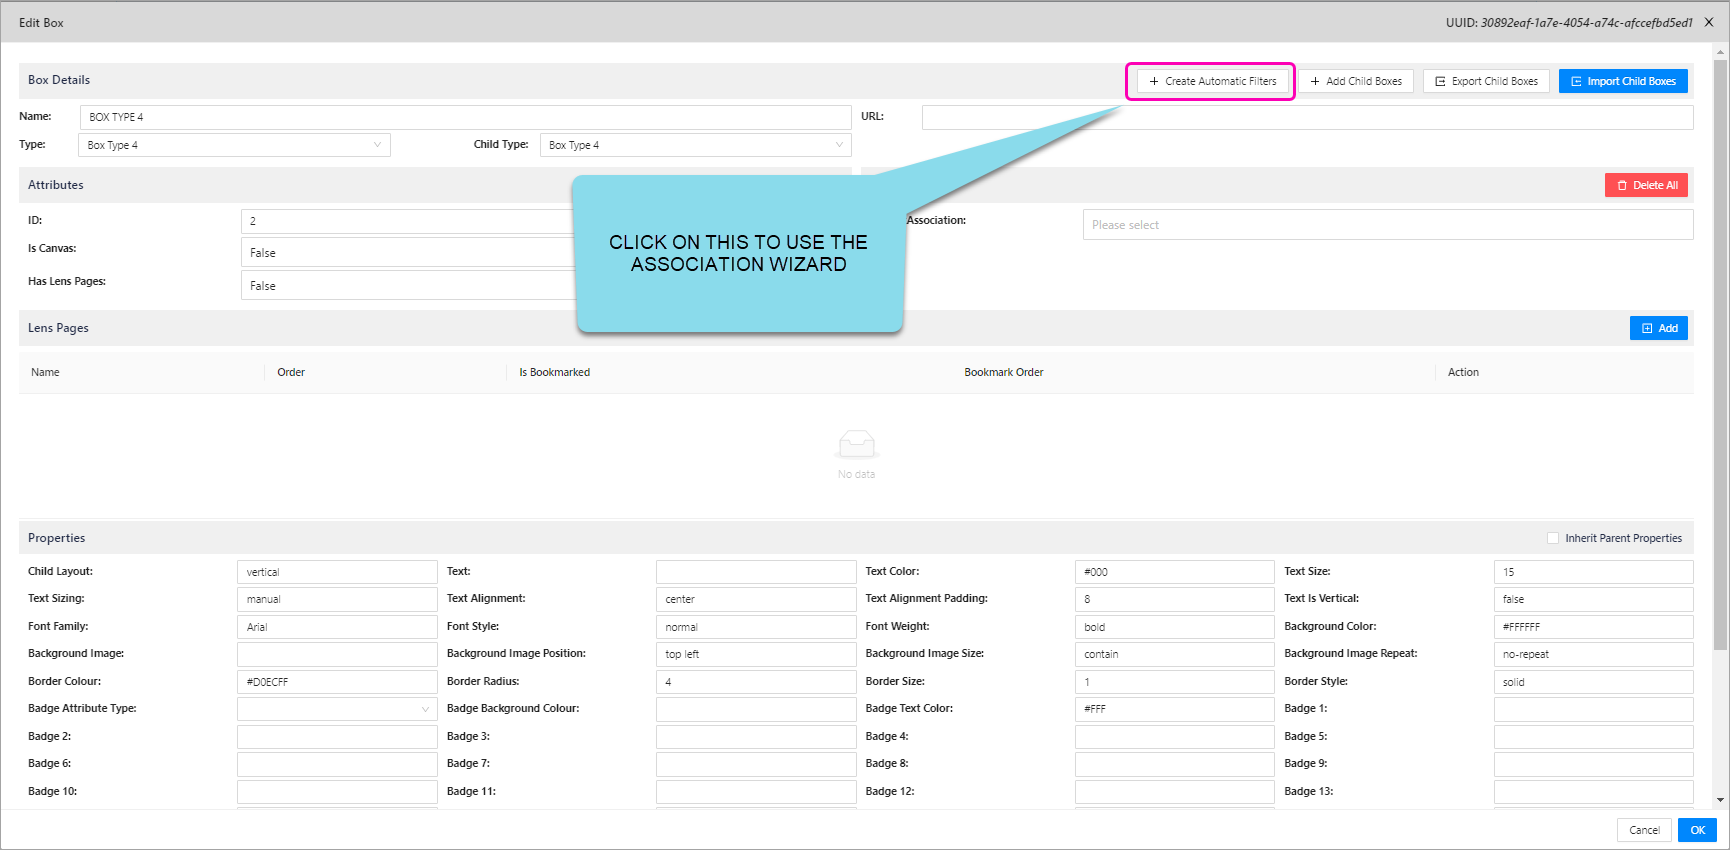
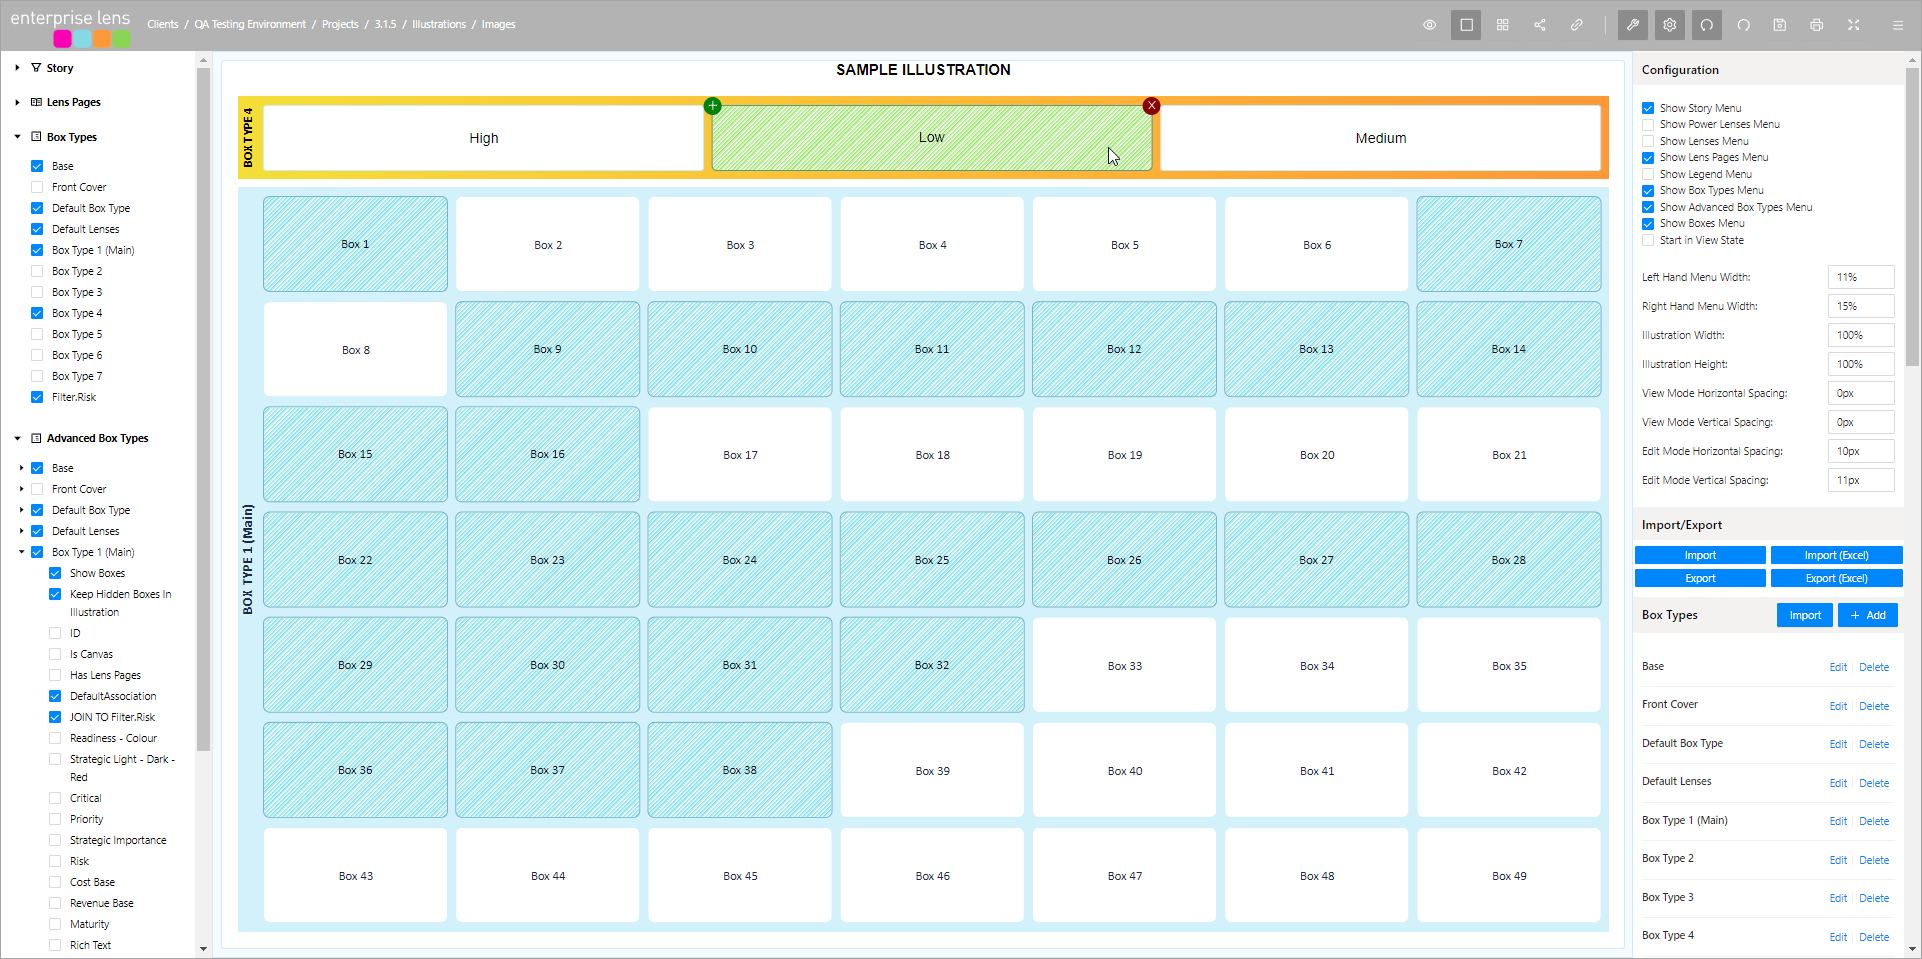
EXAMPLE: You may want to create an association to all boxes based on their risk status of Low, Medium or High.
Simply click on the Box that you would like to populate with the Risk values. This will bring up the Edit Box Form like below:
A new form will now appear titled "Create Automatic Filter Child Boxes".
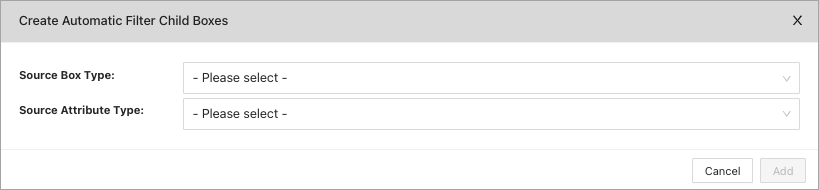
Already you can see that this creation process is simple:
| Options | Description |
|---|---|
| Source Box Type | This is the Box Type that contains the Attributes you want to import as the children boxes. |
| Source Attribute Type | This is the Attribute you will select to import.Every choice available in this attribute type will be shown below as a list. Clicking "Add" at this stage will import the attributes from the attribute type as individual child boxes within the box you are editing. |
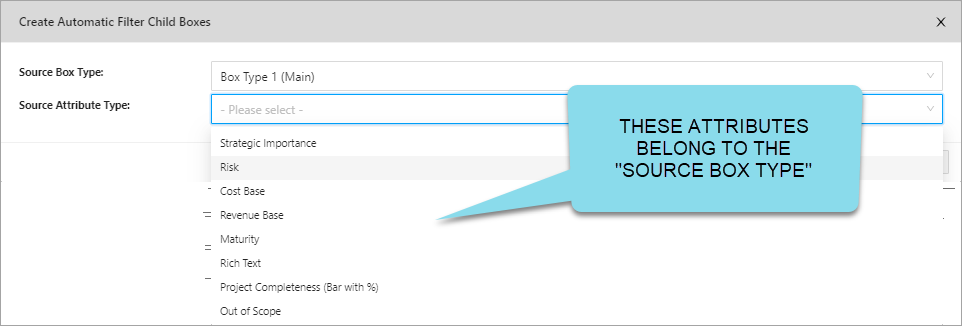
After selecting the Box Type that holds the attribute you want to Filter on - Let's select RISK from the drop down box
The "Values" for the Attribute "RISK" are now displayed, Click Add to have them inserted into your Illustration
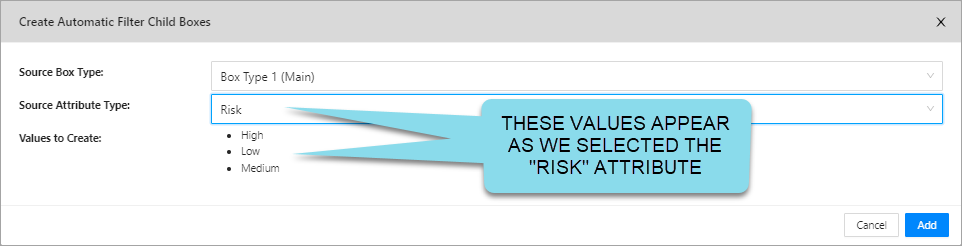
By selecting add the distinct values found for the Risk Attribute within the Box Type 1 (Main) are inserted into the Illustration and the associations between the two box types are created.
In this example, if you were to hover over the new "Low" child box that is created, you will see all Projects that have the Risk attribute set to "Low" and a new two-way association has been created.
2. Power Lens Wizard
Power Lens Wizard can be accessed in edit mode, towards the bottom of the right-hand menu, in a tab called "Power Lenses".
This new feature enables users to easily create Power Lenses without having to edit JSON code. Power Lens Wizard streamlines the process and makes it intuitive for beginners and experinced users alike.
Power Lens Wizard can be accessed in edit mode, towards the bottom of the right-hand menu, in a tab called "Power Lenses".
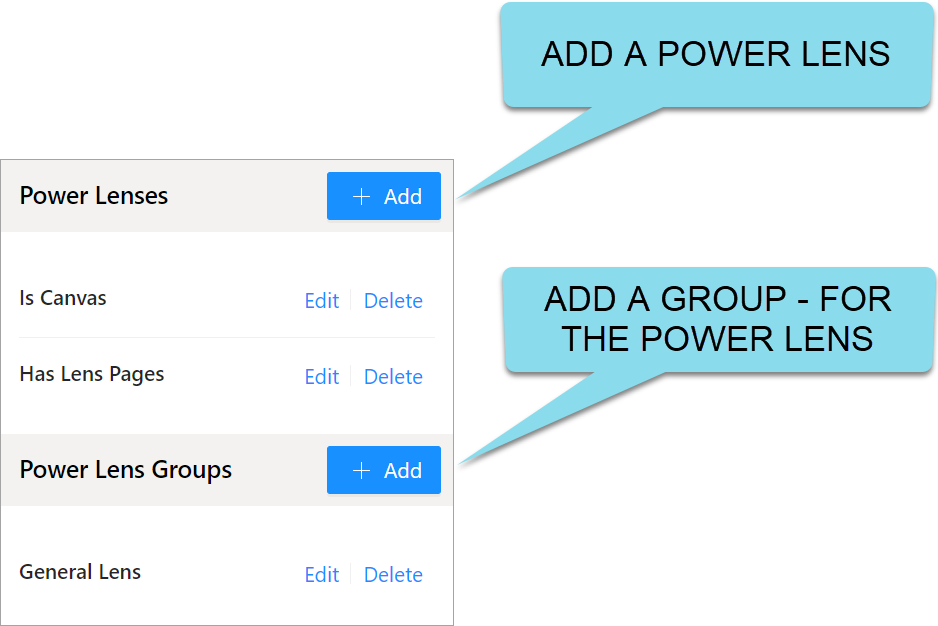
The process to follow is create the Power Lens first and then apply that Power Lens to a Power Lens Group.
To create a new Power Lens, click the + Add button on the right-hand side. Then a form called Add Power Lens will appear.
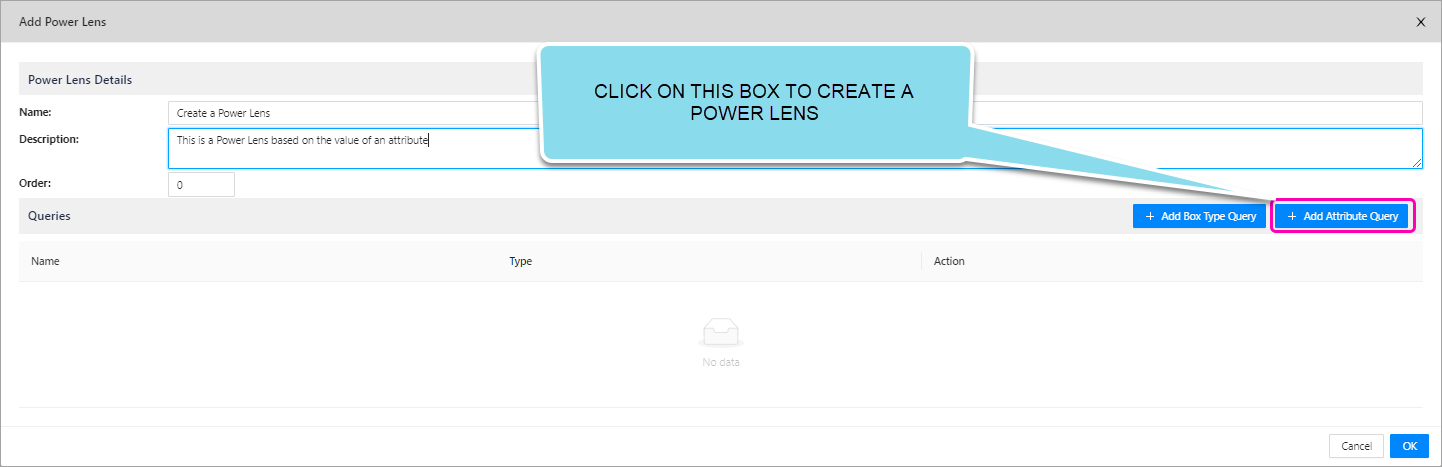
In the image above, you will now select the Add Attribute Query. This will present the Add Attribute Query Form.
| Options | Description | Examples |
|---|---|---|
| Name | Specify the name for your new Power Lens. | |
| Description | You can add a meaningful description for your Power Lens, to help with internal organisation. | |
| Order | Here you will specify the order of the Power Lens in relation to other Power Lenses on the left hand menu. The higher the number, the lower the Power Lens is on the list. The lower the number, the higher the Power Lens is on the list. | A Power Lens of Order -1 will be above the Power Lens with an Order of 5. |
You select the Box Type that holds the Attribute, determine the Comparison Operator you want to use and select the Value you would like to compare against, just as in the form below

Here you will be building a query based on the attributes (and their values) within a box type. This is useful for when you want to compare specific attribute values that boxes have and remove everything else from the screen
Remember that the Parent Box Type must be different from the Children Box Type in a Power Lens.
-
> 200will have the impact of removing boxes from the screen where their value<= 200 -
<= 200will have the impact of removing boxes from the screen where their value> 200 -
< 200will have the impact of removing boxes from the screen where their value>= 200 -
!= 200will have the impact of removing boxes from the screen where their value!= 200 -
== 200will have the impact of removing boxes from the screen where their value= 200
EXAMPLE: You wants to hide Projects that have the attribute Priority value of Low. This example will be used below to explain the available options below:
| Options | Description | Notes |
|---|---|---|
| Name | This is the name of the query you are building. It can (and often will be) the same as your Power Lens name. | You should make the name seperate to the Power Lens name when there are multiple queries within the same Power Lens. |
| Box Types | This is where you will select what box type has the attributes you want to base your query on. | Using our example, you would select Priority. |
| Attribute Type | Here you specify the attribute you want to base your query on. | |
| Comparison Operator | You will set the comparator that the Attribute Type and Value field will be compared against.The boxes that satisfy this comparator will be hidden. The options present are: ==, !=, true, false, includes, >, >=, <, and <=. | Using our example, you would select ==This is because we want to hide the boxes that have Priority equal to "Low". |
| Value | This is the field that the comparator will be used with, in conjunction with the Attribute Type.This needs to be a valid choice or entry that either an attribute in a box could have (choice-based attributes), or is set to (text-based attributes). | Using our example, you would enter "Low"This way, in conjuction with the comparator the query looks at the attribute Priority, for a match (==) with "Low". This way, the query will hide any Projects with a Priority of Low. |
| Restrict By Box Type | Limit the attributes searched by the Query to only the box type you have specified. | This is only when you are comparing or using Box UUIDs as the Attribute Type. |
3. Templates
This features is a refinement of templates and provides the ability to setup industry and company specific templates and facilitates simple replication. This allows access to a library of templates that are simple to access and can be tailored to new opportunities, improving the speed to respond to new business.
This new functionality is found by editing the Client, in the right-hand side of the form. Click Edit to open the Edit Client form.
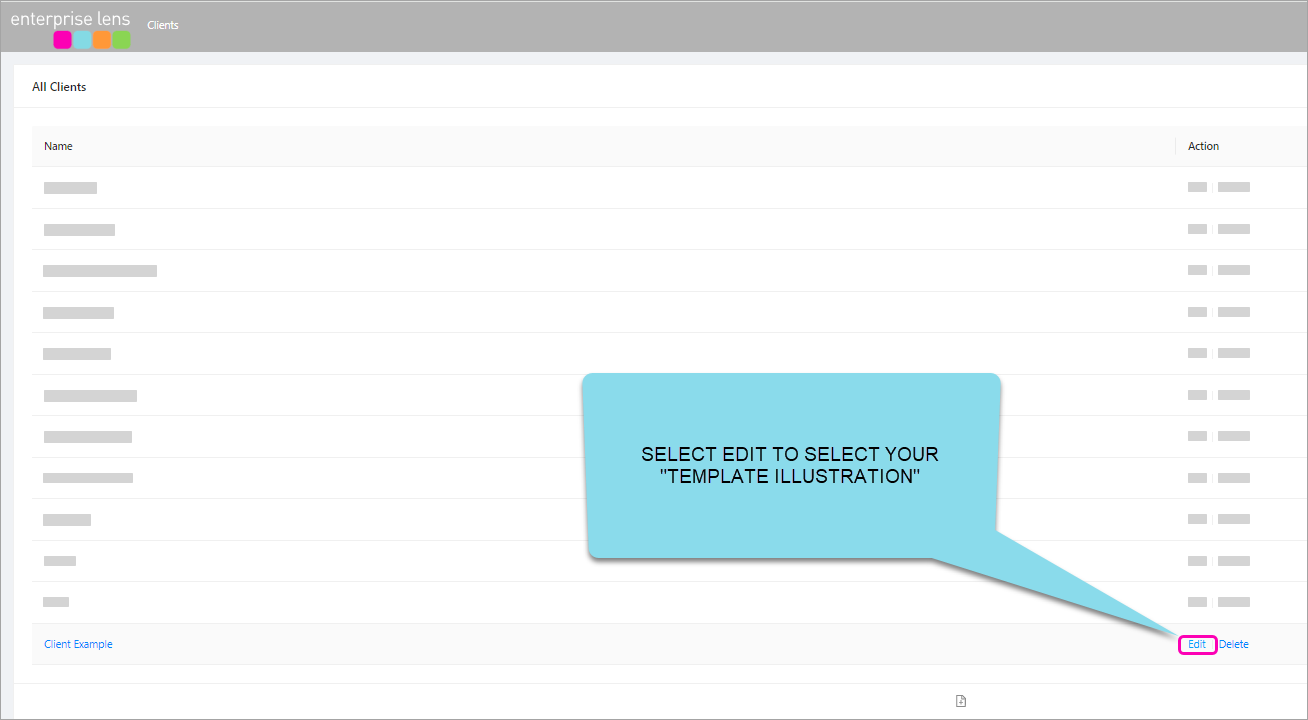
When you click "Edit" it will present the Client Details form. Use the drop down arrow to provide a list of Template Clients you can choose from (this will be determined by your access privileges).
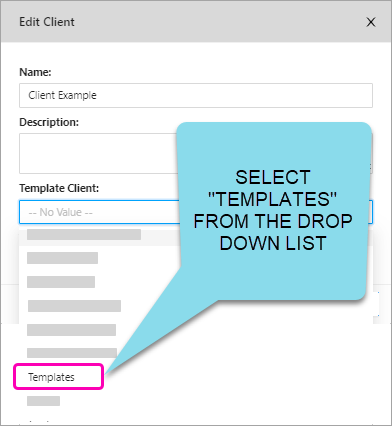
After selecting a Template Client, (we selected Template from the example above) - all Template Projects (Directories) that belong to that Client will appear in the drop down list in the Template Project` area

Select a Template Project and all the Template Illustration that are part of that Template Project will present themselves whenever you create ANY new Illustration for that Client.
Every Client can have their OWN Templates to Choose from or you can build a central repository.
4. Support for 'Numbers'
You are now able to create attributes with a number value type, this can be decimal, negative or positive.
This is useful in a number of cases where:
-
You need to build Power Lenses to hide or show boxes that meet a certain numerical criteria
- i.e. A new Power Lens that shows all Projects greater than $0 value
-
You may need to have a formatted version of the number for presentation purposes eg separate the value displayed as a lens, from the value used for Lens calculations
- i.e. You have two attributes for "Amount (Text Based)", as below. One is formatted as TEXT, and the other is a number value type. This is so you have an attribute to perform calculations on, such as greater than (
>=), less than (<=), etc with Power Lenses.
- i.e. You have two attributes for "Amount (Text Based)", as below. One is formatted as TEXT, and the other is a number value type. This is so you have an attribute to perform calculations on, such as greater than (
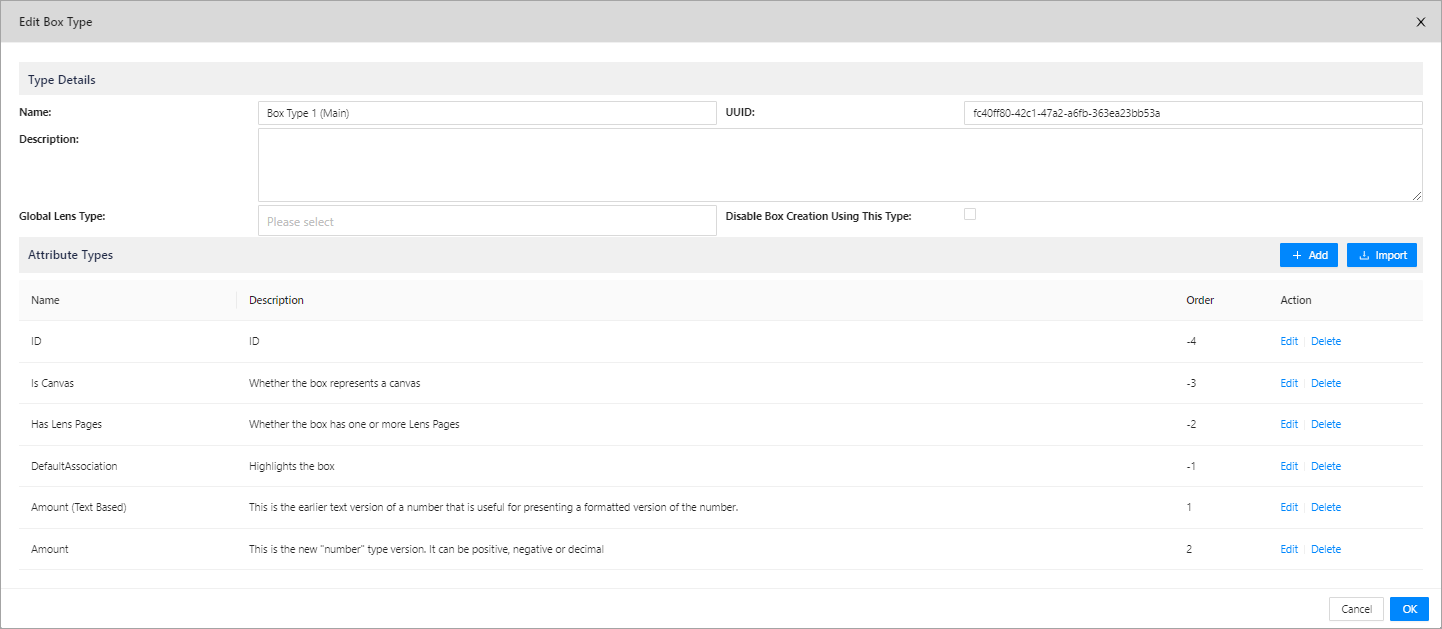
If you edit the "Amount" Attribute (that has order 2 in the example above)
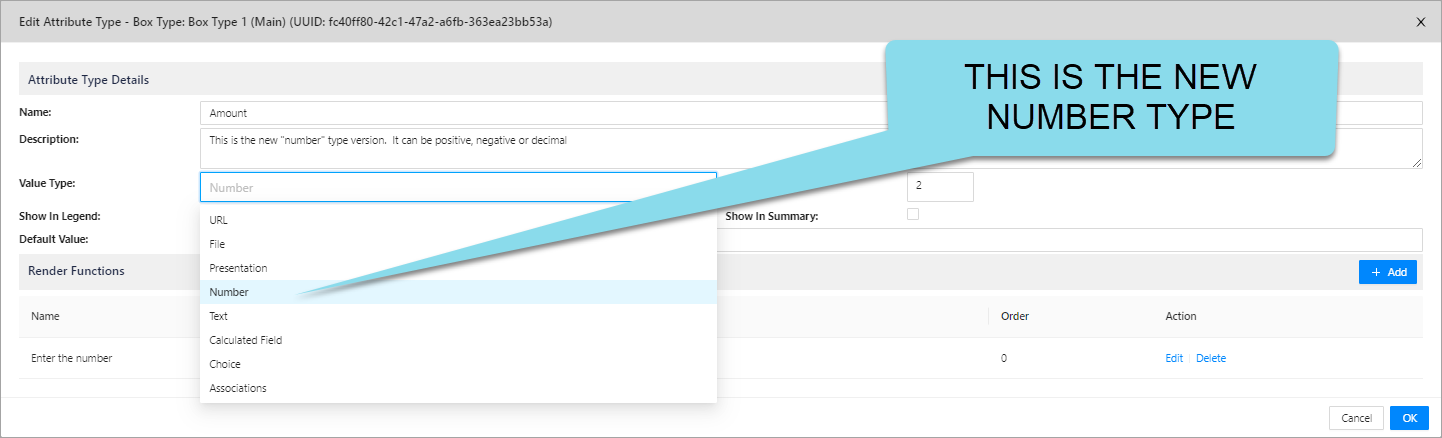
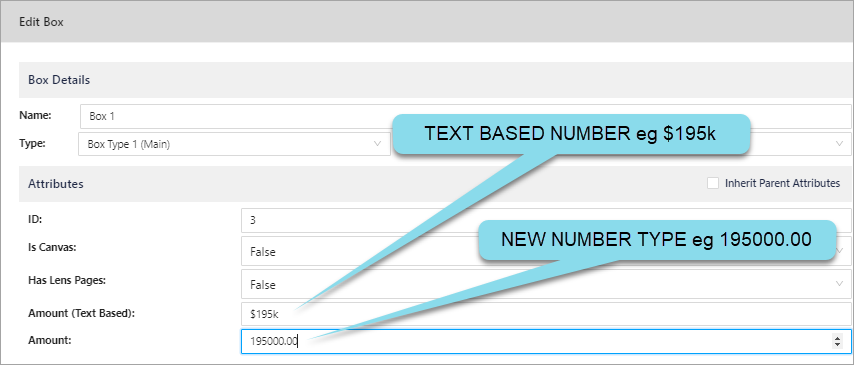
You can use the arrows to increase or decrease the value in the Amount attribute above.
Note: The Number value type can now be used in Power Lenses to provide < comparisons
5. Jira Codes
New Features
EL-328 Ability to set a Number type against a lens. Till now, everything was treated as a string
EL-635 Power Lens Editor - similar functionality to Lens Editor but more powerful