Lens Wizard
A new Wizard is available inside all boxes, which allows you to quickly create data-driven associations and a lens according to the unique values of a lens.
With the new Wizard you are able to:
- Dynamically create new child boxes, based on the unique values of a lens
- Show each unique value within a box, via a newly created lens
- Automatically create Power Lenses to filter boxes by lens values
1. Steps
1.1. Open the Wizard
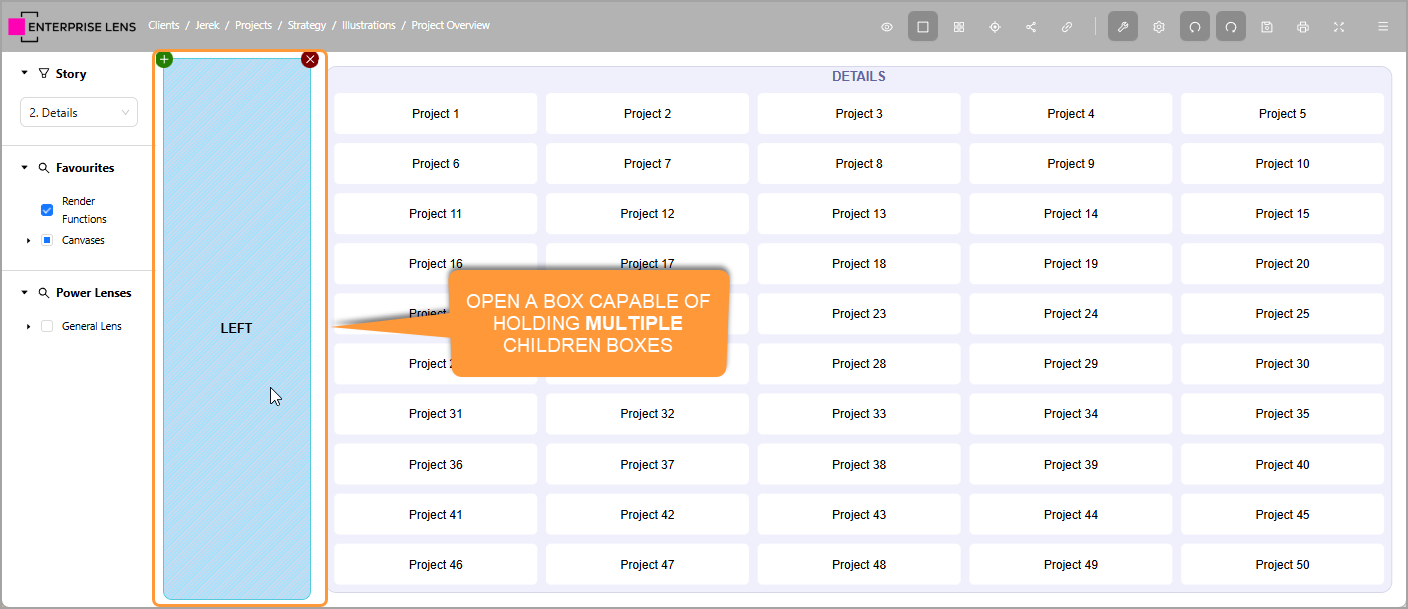
Open your illustration and select a box that is large enough to contain several child boxes.
- In our example, we are using the
LEFTbox within Default Template
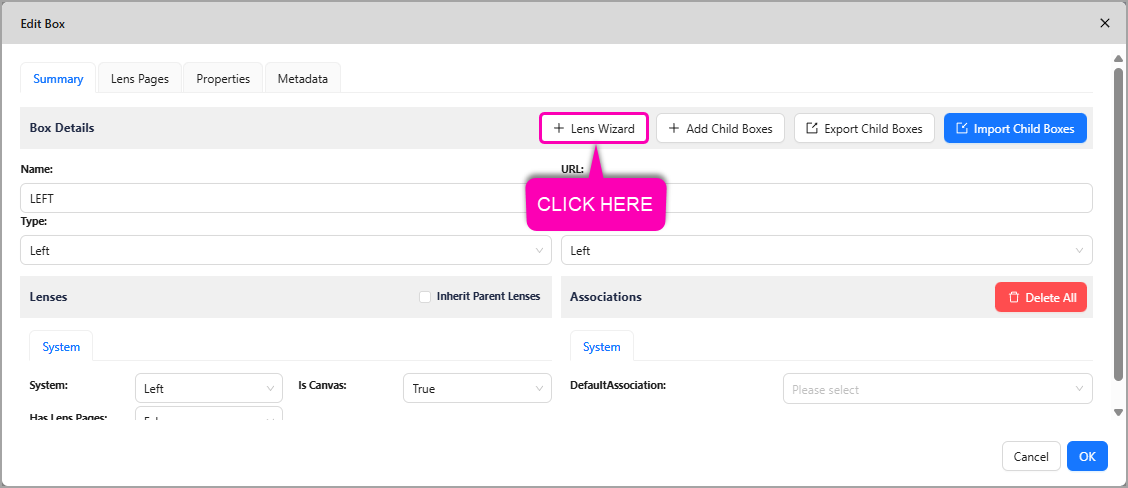
Within the opened Edit Box form, click the + Lens Wizard button located on the top Box Details row.
1.2. Select Source Box and Lens Types
You will now be greeted with the Lens Wizard, where you will be asked to select a Source Box Type and Source Lens Type.
- The Source Box Type is the Box Type that contains the Lens you would like to create child boxes and a Lens Style from
- The Source Lens Type is the Lens itself which you will create child boxes and a Lens Style from.

The lens you would like to create should be chosen carefully, below is a flow chart to help you choose a lens.
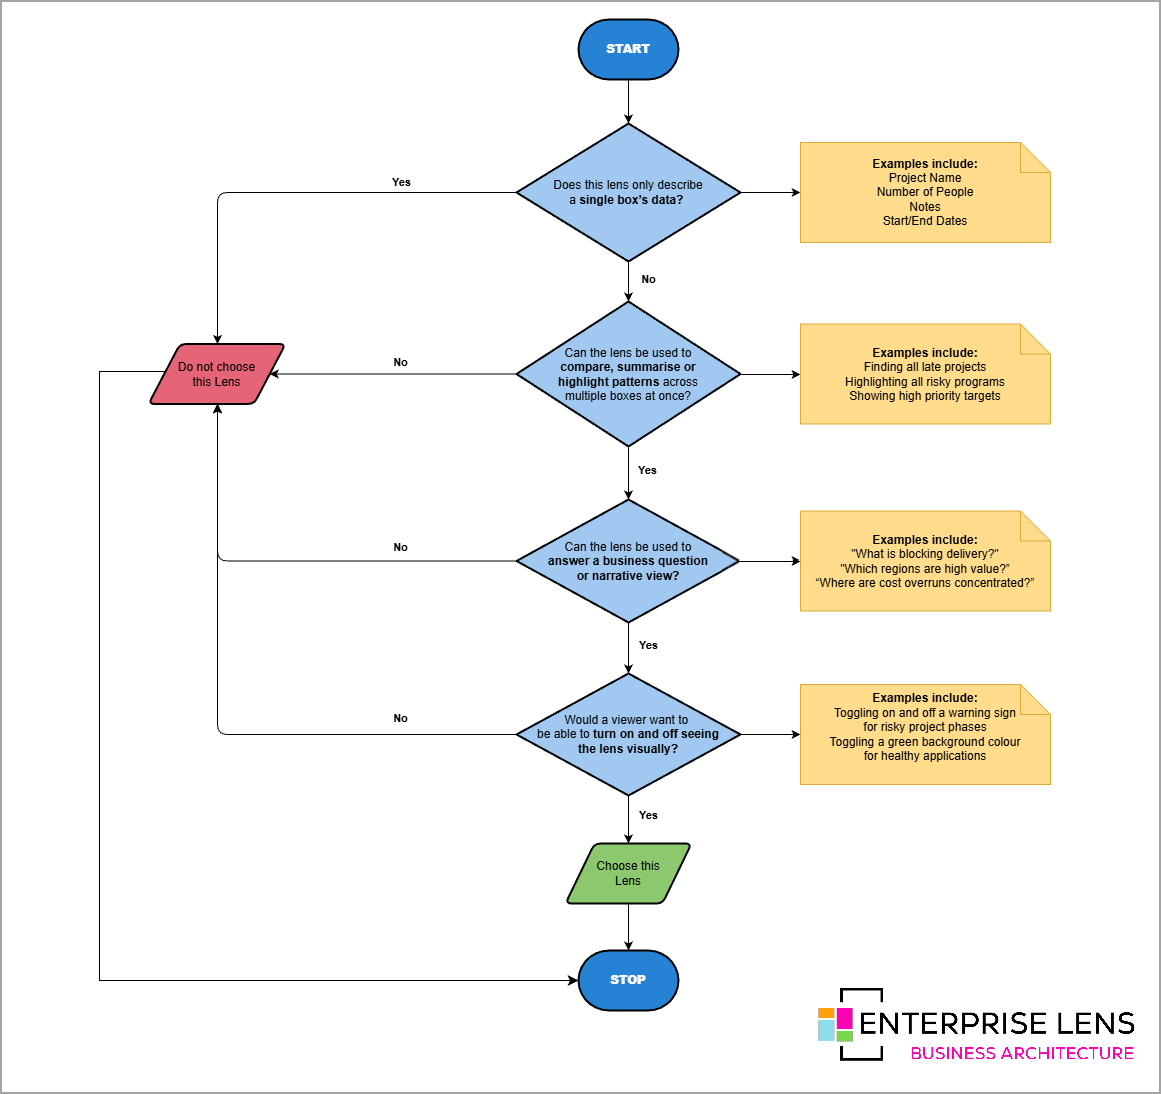
| Choose a Lens if | Do NOT choose a Lens if |
|---|---|
| - The lens is not just for storing information - You are analysing many boxes together, based on the lens' values - You want a visual way to see the present | - The lens only stores information; and - The information belongs to individual boxes; and - The information cannot be analysed across multiple boxes |
In our given example, the Details Source Box and Surname Lens Types were selected, because:
- The lens values described multiple boxes, not just individual boxes by themselves; and
- The lens can be used to compare the number of projects assigned to each person by Surname; and
- The lens can be used to answer the business question of who are projects concentrated to most; and
- A viewer would most likely want to see this insight visually, with the ability to turn it on and off

By default, each value will get a Power Lens created automatically for you. This allows you to filter your source boxes according to the values they have.
1.3. Create Lenses
You can now create Lenses per unique value of the lens you selected, by clicking the Create Lens switch. Additionally, you can set the:
- Lens Label, which can be either the Lens' Values shown below, or the Lens Name. The Label is visible on the Lens. (Default: Value)
- Lens Position, which can be one of nine grid positions within a box. (Default: Top Left)
- Top Left
- Top Center
- Top Right
- Middle Left
- Middle Center
- Middle Right
- Bottom Left
- Bottom Center
- Bottom Right
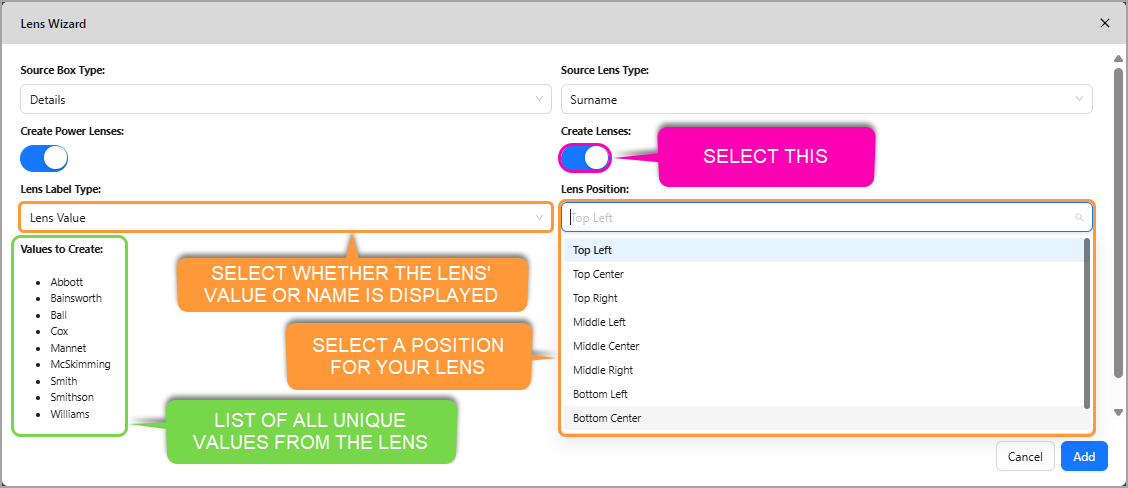
- Click
AddandOKto confirm your selections and exit the Wizard.
2. Functionality
Through the automatically created Power Lenses, you can control your newly created Power Lenses and Lenses.
2.1. Turn On/Off the Lens
You can select and deselect the Show Lens Power Lens, to turn on and off your lens respectively.
2.2. Filter Boxes
You can select and deselect each Power Lens labelled after a value, to filter boxes according to what Lens Value they have.
2.3. Dynamically formatting the Lens
Click inside any child box that was automatically created from a lens value, then open the Formatting tab and change any style option.
- Any box which has the same lens value as the child box name will be formatted accordingly
In the below example, the illustrator edited the Bainsworth box, and all boxes with the Bainsworth value had their lens changed to Green with White text.